Creating Your First Campaign
After a user creates an account and logs into the Catalytics console, the first screen displayed is "Create Campaigns." Many of the set-up steps in other advertising platforms happen automatically in Catalytics, but this automatic configuration requires the user to complete the campaign set-up, select a subscription amount, and pay with a credit card.
After a campaign is set up and a payment is made:
- A monthly insertion order is generated with the budget set to the subscription amount
- The advertiser is assigned the necessary IDs to serve ads on the network
- Data from the user's selected targets (business locations or article URLs) are translated to targeting instructions and attached to campaigns
- Ad creative is validated and submitted for network audit
- A tracking code is generated and made available in the advertiser's account
These steps all happen automatically. We explain them here for the benefit of users coming from other platforms who are potentially expecting to be required to create their own campaign hierarchies, insertion orders, and tracking scripts.
Prerequisites (Ad Creative)
The only thing an advertiser needs to get started is at least one ad (banner or HTML5). An introduction to ad creative production is available here: Getting Started with Banner Ads
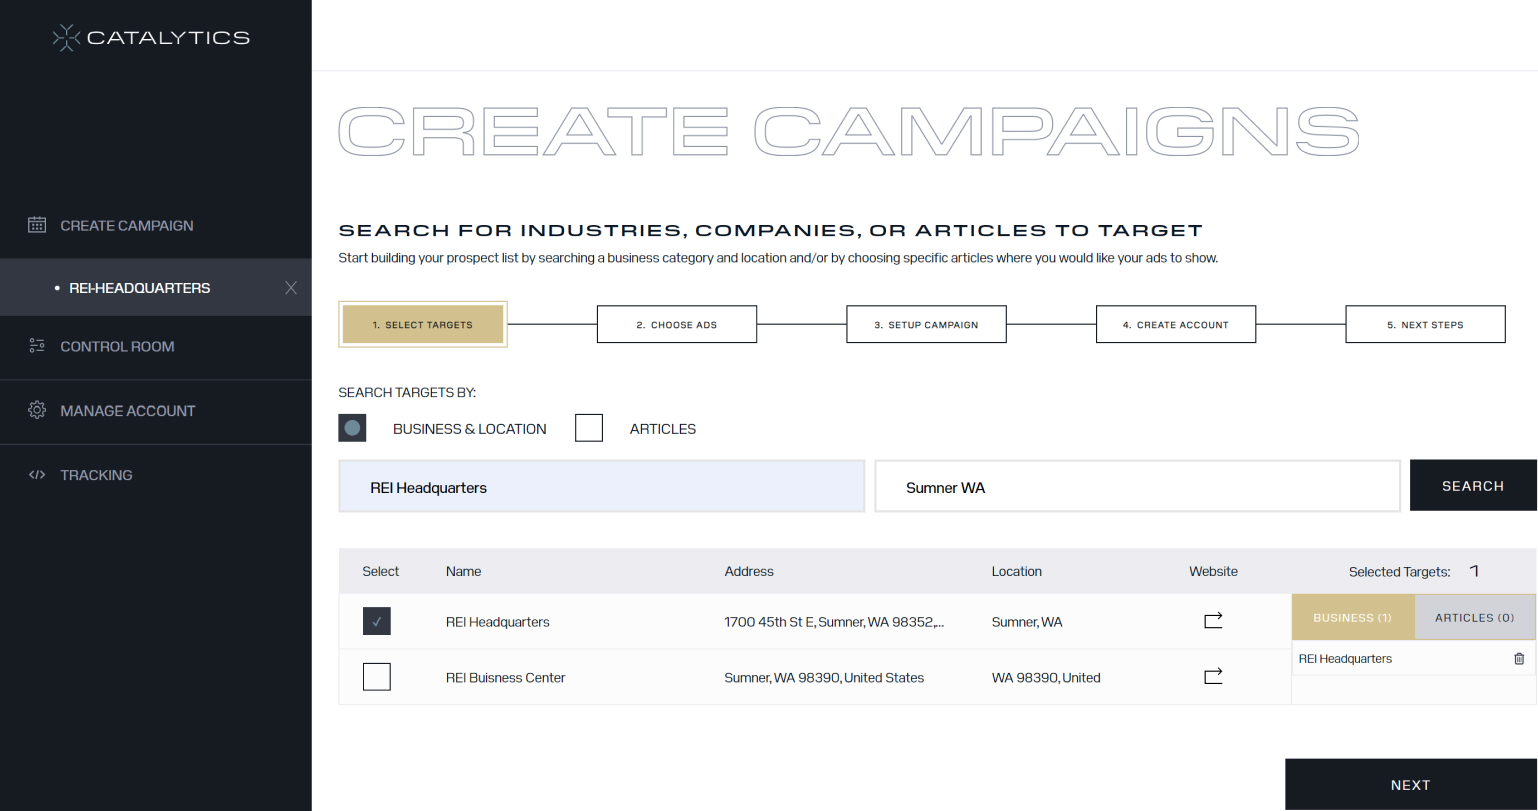
Step 1: Search for Businesses or Articles

The first step to create a campaign in Catalytics is to search for business prospects or online articles to target with media. Users can search for:
- Companies (e.g. Business: "REI headquarters" Location: "Sumner, WA")
- Business Types (e.g. Business: "car dealerships" Location: "Dublin, OH")
- Articles (e.g. "best accounting software")
To search for a company or business types, ensure that "Business & Location" is selected under "Search Targets By." To search for online articles where you want your ads to serve, select "Articles" under "Search Targets By."
Check the checkbox next to the articles or business locations you want to target with your campaigns. Selected targets will appear in the sidebar next to the search results.
Click Next.
Step 2: Upload Ads

- Upload ads by dragging files into the upload box or click the box to use a file explorer to select ads.
- After ads are uploaded, click the "ADD TO CAMPAIGN" button
- Add a landing page URL in the field next to the ad. (A landing page is where a user will land if he or she clicks the ad.) If you want to be able to recognize visits from Catalytics campaigns in your website analytics, add tracking parameters to your landing page URL.
- Click Next
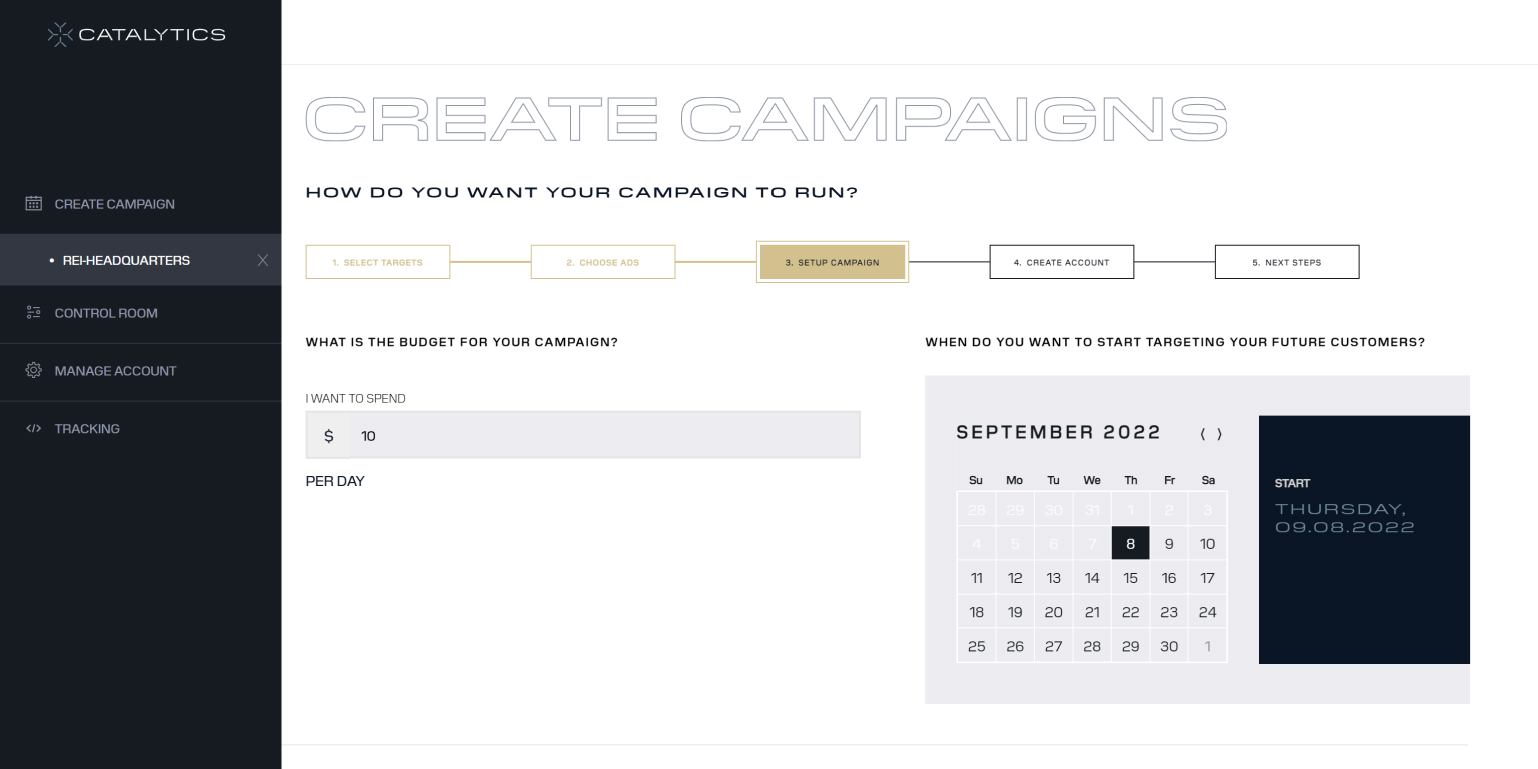
Step 3: Set a Daily Budget

- Enter a daily budget in the "I WANT TO SPEND" field next to the calendar toward the top of the screen. There is no minimum for a campaign budget, but if the daily campaign budgets are expected to spend less than $200, you will receive a warning that the minimum subscription is $200. This is to let you know that your current settings won't spend your entire budget. We recommend increasing the budget or creating more campaigns to spend your entire subscription amount. Otherwise, the balance is forfeited.
- After setting a budget, scroll down to the table that lists your campaigns. Ads can be assigned to campaigns individually, or you may assign all ads to all campaigns (typically recommended) by clicking the ellipsis (three dots) in the "Assign Uploaded Ad(s)" column, then click "Assign All Ads to All Targets".
- Click Next
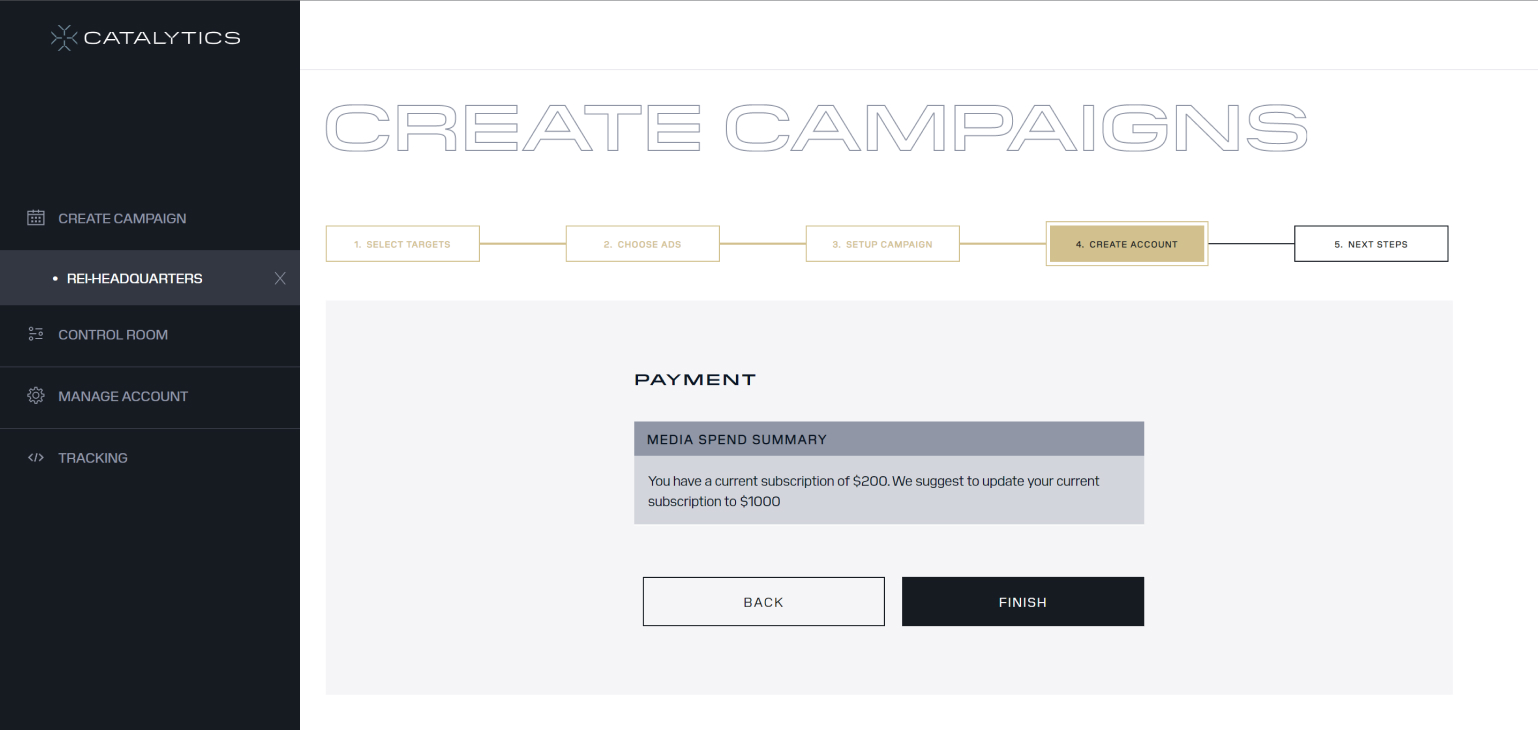
Step 4: Create a Subscription

- The recommended subscription is an approximation of expected spend based on the total of the campaign budgets. Usually this is the best option, but if this is your first time and you're planning to add more campaigns later, you can select a higher subscription amount that matches your budget and then continue adding campaigns later until you reach this budget.
- Complete the payment
That's It!
After your payment is made, you can watch as your selections are automatically translated into campaigns. If you are served the confirmation screen, everything is all set. Campaigns can start serving as quickly as the next day, although most don't begin serving for two days after set-up is complete.
Errors
Occasionally one of the APIs that Catalytics communicates with during set-up times-out without a response and the user receives an error. If you receive an error, you should have the option to go back and retry the submission. If the payment was already processed but there was a set-up error, please send us a message. Most of the time, we can locate your settings in our logs and reconstruct your campaigns.
If you decide to go back and retry the payment to re-initialize the set-up, let us know and we will make sure your credit card hasn't been charged twice and that your subscription is correctly configured. (There is also a built-in protection for duplicate payments in the payment processing system.)